 Leif160519的blog
——————
nginx开启目录浏览功能及主题美化
1.开启目录浏览功能
Nginx提供了相应的ngx_http_autoindex_module 模块
该模块有以下几个命令:
| 命令 | 默认值 | 值域 | 作用域 | EG |
|---|---|---|---|---|
| autoindex | off | on:开启目录浏览;off:关闭目录浏览 | http, server, location | autoindex on;打开目录浏览功能 |
| autoindex_format | html | html、xml、json、jsonp 分别用这几个风格展示目录 | http, server, location | autoindex_format html;以网页的风格展示目录内容。该属性在1.7.9及以上适用 |
| autoindex_exact_size | on | on:展示文件字节数; off:以可读的方式显示文件大小 | http, server, location | autoindex_exact_size off; 以可读的方式显示文件大小,单位为 KB、MB 或者 GB,autoindex_format为html时有效 |
| autoindex_localtime | off | on、off:是否以服务器的文件时间作为显示的时间 | http, server, location | autoindex_localtime on; 以服务器的文件时间作为显示的时间,autoindex_format为html时有效 |
1.1 浏览目录基本配置
在http下添加参数即可
http {
    autoindex on;   #开启nginx目录浏览功能
    autoindex_exact_size off;   #文件大小从KB开始显示
    autoindex_localtime on;   #显示文件修改时间为服务器本地时间
    charset utf-8,gbk;     #防止中文目录出现乱码
    include       /etc/nginx/mime.types;
    default_type  application/octet-stream;

    log_format  main  '$remote_addr - $remote_user [$time_local] "$request" '
                      '$status $body_bytes_sent "$http_referer" '
                      '"$http_user_agent" "$http_x_forwarded_for"';

    access_log  /var/log/nginx/access.log  main;

    sendfile        on;
    #tcp_nopush     on;

    keepalive_timeout  65;

    #gzip  on;

    include /etc/nginx/conf.d/*.conf;
}
1.2 使配置生效
重新加载nginx配置文件即可
nginx -s reload
注意:ubuntu下的nginx配置文件有两个,一个是
/etc/nginx/nginx.conf,还有一个是/etc/nginx/conf.d/default.conf
1.3 补充
若只想部分目录提供文件浏览功能,则:
location /downloads {
    autoindex on;   #开启nginx目录浏览功能
    autoindex_exact_size off;   #文件大小从KB开始显示
    autoindex_localtime on;   #显示文件修改时间为服务器本地时间
    charset utf-8,gbk;  #设置文件名编码,防止乱码
    root /usr/local/src; #文件目录
}
附目录结构:
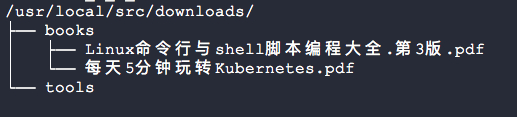
注意:上面配置中的root一项可以改写为:
alias /usr/local/src/downloads;
关于alias和root的区别参看:https://github.icu/articles/2019/09/25/1569374756088.html
2.主题美化
nginx开启文件浏览功能之后是这个样子的
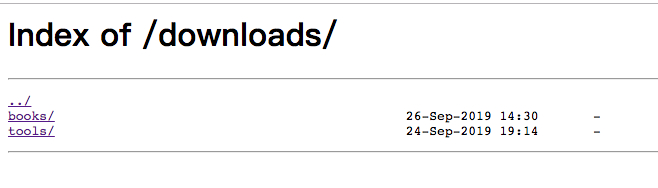
感觉很丑有没有,而且字体很小,我们使用开源的FancyIndex来美化页面,然后默认安装的nginx是不支持fancyindex参数的,故需要重新编译安装nginx。
2.1 查看编译参数
先弄清楚nginx已经编译了哪些模块,使用2>&1 nginx -V | tr ' ' '\n'|grep module命令查看:
[root@centos ~]# 2>&1 nginx -V | tr ' ' '\n'|grep module
--modules-path=/usr/lib64/nginx/modules
--with-http_auth_request_module
--with-http_ssl_module
--with-http_v2_module
--with-http_realip_module
--with-http_addition_module
--with-http_xslt_module=dynamic
--with-http_image_filter_module=dynamic
--with-http_geoip_module=dynamic
--with-http_sub_module
--with-http_dav_module
--with-http_flv_module
--with-http_mp4_module
--with-http_gunzip_module
--with-http_gzip_static_module
--with-http_random_index_module
--with-http_secure_link_module
--with-http_degradation_module
--with-http_slice_module
--with-http_stub_status_module
--with-http_perl_module=dynamic
--with-mail_ssl_module
--with-stream_ssl_module
--with-google_perftools_module
--add-module=ngx-fancyindex-0.4.3
查看完整的编译参数:nginx -V:
[root@entos ~]# nginx -V
nginx version: nginx/1.17.4
built by gcc 4.8.5 20150623 (Red Hat 4.8.5-39) (GCC)
built with OpenSSL 1.0.2k-fips  26 Jan 2017
TLS SNI support enabled
configure arguments: --prefix=/usr/share/nginx --sbin-path=/usr/sbin/nginx --modules-path=/usr/lib64/nginx/modules --conf-path=/etc/nginx/nginx.conf --error-log-path=/var/log/nginx/error.log --http-log-path=/var/log/nginx/access.log --http-client-body-temp-path=/var/lib/nginx/tmp/client_body --http-proxy-temp-path=/var/lib/nginx/tmp/proxy --http-fastcgi-temp-path=/var/lib/nginx/tmp/fastcgi --http-uwsgi-temp-path=/var/lib/nginx/tmp/uwsgi --http-scgi-temp-path=/var/lib/nginx/tmp/scgi --pid-path=/run/nginx.pid --lock-path=/run/lock/subsys/nginx --user=nginx --group=nginx --with-file-aio --with-ipv6 --with-http_auth_request_module --with-http_ssl_module --with-http_v2_module --with-http_realip_module --with-http_addition_module --with-http_xslt_module=dynamic --with-http_image_filter_module=dynamic --with-http_geoip_module=dynamic --with-http_sub_module --with-http_dav_module --with-http_flv_module --with-http_mp4_module --with-http_gunzip_module --with-http_gzip_static_module --with-http_random_index_module --with-http_secure_link_module --with-http_degradation_module --with-http_slice_module --with-http_stub_status_module --with-http_perl_module=dynamic --with-mail=dynamic --with-mail_ssl_module --with-pcre --with-pcre-jit --with-stream=dynamic --with-stream_ssl_module --with-google_perftools_module --with-debug --with-cc-opt='-O2 -g -pipe -Wall -Wp,-D_FORTIFY_SOURCE=2 -fexceptions -fstack-protector-strong --param=ssp-buffer-size=4 -grecord-gcc-switches -specs=/usr/lib/rpm/redhat/redhat-hardened-cc1 -m64 -mtune=generic' --with-ld-opt='-Wl,-z,relro -specs=/usr/lib/rpm/redhat/redhat-hardened-ld -Wl,-E'
2.2 动态编译添加Nginx模块
1.下载最新nginx源码:nginx-download
wget https://nginx.org/download/nginx-1.17.4.tar.gz
2.在github上下载源码:ngx-fancyindex
wget https://github.com/aperezdc/ngx-fancyindex/archive/v0.4.3.zip
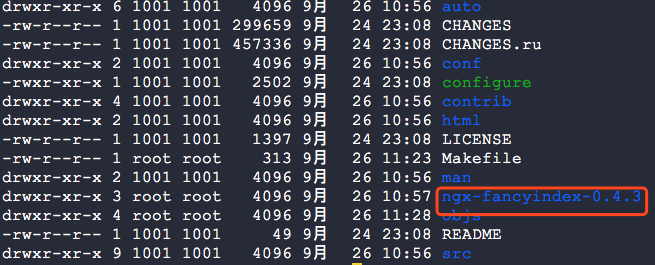
3.将nginx源码压缩包解压(目录随意),然后将fancyindex的源码压缩包解压到nginx的源码目录里
4.到这里先暂时不要make,先解决一下依赖问题(依赖包非常多,我当时也是一步一步找了好久)
yum -y install redhat-rpm-config pcre-devel zlib zlib-devel openssl openssl-devel perl-devel perl-ExtUtils-Embed gd-devel GeoIP GeoIP-devel GeoIP-data libxslt-devel gperftools
5.cd进nginx源码目录,准备编译参数。因为上一步执行nginx -V的时候得到了众多参数,这次需要在上面的参数基础上新增一个fancyindex的参数,添加到末尾即可(实际上就是添加的目录文件夹)
./configure --prefix=/usr/share/nginx --sbin-path=/usr/sbin/nginx --modules-path=/usr/lib64/nginx/modules --conf-path=/etc/nginx/nginx.conf --error-log-path=/var/log/nginx/error.log --http-log-path=/var/log/nginx/access.log --http-client-body-temp-path=/var/lib/nginx/tmp/client_body --http-proxy-temp-path=/var/lib/nginx/tmp/proxy --http-fastcgi-temp-path=/var/lib/nginx/tmp/fastcgi --http-uwsgi-temp-path=/var/lib/nginx/tmp/uwsgi --http-scgi-temp-path=/var/lib/nginx/tmp/scgi --pid-path=/run/nginx.pid --lock-path=/run/lock/subsys/nginx --user=nginx --group=nginx --with-file-aio --with-ipv6 --with-http_auth_request_module --with-http_ssl_module --with-http_v2_module --with-http_realip_module --with-http_addition_module --with-http_xslt_module=dynamic --with-http_image_filter_module=dynamic --with-http_geoip_module=dynamic --with-http_sub_module --with-http_dav_module --with-http_flv_module --with-http_mp4_module --with-http_gunzip_module --with-http_gzip_static_module --with-http_random_index_module --with-http_secure_link_module --with-http_degradation_module --with-http_slice_module --with-http_stub_status_module --with-http_perl_module=dynamic --with-mail=dynamic --with-mail_ssl_module --with-pcre --with-pcre-jit --with-stream=dynamic --with-stream_ssl_module --with-google_perftools_module --with-debug --with-cc-opt='-O2 -g -pipe -Wall -Wp,-D_FORTIFY_SOURCE=2 -fexceptions -fstack-protector-strong --param=ssp-buffer-size=4 -grecord-gcc-switches -specs=/usr/lib/rpm/redhat/redhat-hardened-cc1 -m64 -mtune=generic' --with-ld-opt='-Wl,-z,relro -specs=/usr/lib/rpm/redhat/redhat-hardened-ld -Wl,-E' --add-module=ngx-fancyindex-0.4.3
注意:若你的fancyindex是直接用
git clone的,则最后的参数不会有-0.4.3,直接clone是不会有版本号的。
6.编译
make
7.安装
make install
8.停止正在运行的nginx服务
systemctl stop nginx
9.进入nginx源码目录下的objs目录,执行2>&1 ./nginx -V | tr ' ' '\n'|grep fan
[root@centos objs]# 2>&1 ./nginx -V | tr ' ' '\n'|grep fan
--add-module=ngx-fancyindex-0.4.3
10.查看nginx的可执行文件路径
[root@centos nginx-1.17.4]# which nginx
/usr/sbin/nginx
11.用objs目录下的nginx文件替换/usr/sbin下面的nginx即可
[root@centos objs]# cp nginx /usr/sbin/nginx
2.3 Fancy Index 配置
1.不使用主题
走到这一步,你已经成功一大半了,若你不想使用第三方fancyindex主题,可以直接在nginx中这样设置:
        location /downloads {
            fancyindex on;
            fancyindex_localtime on;
            fancyindex_exact_size off;
#            autoindex on;   #开启nginx目录浏览功能
#            autoindex_exact_size off;   #文件大小从KB开始显示
#            autoindex_localtime on;   #显示文件修改时间为服务器本地时间
            charset utf-8,gbk;  #设置文件名编码,防止乱码
	    alias /usr/local/src/downloads;
        }
注意:安装fancyindex过后是可以直接替换掉autoindex配置的,它们的功能一样,只不过是主题样式不同而已。
重启nginx(上一步因为替换nginx可执行文件将nginx服务停止了)
systemctl start nginx
效果如下:


细心的同学可能会发现,由于Linux这本书名字太长,导致了文件名出现截断现象,原因是Ngx-FancyIndex将文件名截断为50个字符减去3,然后在截断的名称后附加了
..>符号,解决办法是指定最大文件名长度:
fancyindex_name_length 500;
效果:

2.使用主题
下载主题:
git clone https://github.com/TheInsomniac/Nginx-Fancyindex-Theme.git
将下载好的主题复制到/usr/share/nginx/html中并重命名为fancyindex
cp -r Nginx-Fancyindex-Theme /usr/share/nginx/html/fancyindex
3.配置nginx
方法一:
        location /downloads {
            fancyindex on;
            fancyindex_localtime on;
            fancyindex_exact_size off;
            fancyindex_header "/usr/share/nginx/html/fancyindex/header.html";
            fancyindex_footer "/usr/share/nginx/html/fancyindex/footer.html";
            fancyindex_ignore "fancyindex";
            charset utf-8,gbk;  #设置文件名编码,防止乱码
	    alias /usr/local/src/downloads;
        }
方法二:
        location /downloads {
            include /usr/share/nginx/html/Nginx-Fancyindex-Theme/fancyindex.conf;
            charset utf-8,gbk;  #设置文件名编码,防止乱码
	    alias /usr/local/src/downloads;
        }
fancyindex.conf中的配置包含了方法一中的配置
# Include in location directive
  fancyindex on;
  fancyindex_localtime on; #on for local time zone. off for GMT
  fancyindex_exact_size off; #off for human-readable. on for exact size in bytes
  fancyindex_header "/fancyindex/header.html";
  fancyindex_footer "/fancyindex/footer.html";
  fancyindex_ignore "fancyindex"; #ignore this directory when showing list
# end include
4.重启nginx
nginx -s reload
5.效果:


参考:
Nginx浏览目录配置及美化
配置 Nginx 的目录浏览功能
Nginx-Fancyindex-Theme
3.注意点
3.1 ubuntu下nginx的安装
ubuntu下nginx请下载安装https://github.icu/downloads/tools/linux/nginx_1.16.1-1_xenial_amd64.deb
安装完成后,配置文件路径与centos下的有些许不同,centos的主要配置文件在/etc/nginx/nginx.conf下,用户也可以在/etc/nginx/conf.d下新建端口号.conf文件,使用nginx -c /etc/nginx/nginx.conf命令启动nginx,刷新配置使用nginx -s reload
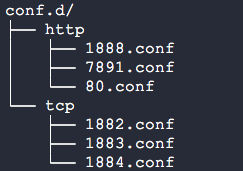
而ubuntu在安装完nginx后,除了/etc/nginx/nginx.conf主配置文件外,还会在conf.d下自动生成一个default.conf文件,内容默认为80的配置
我们只需要将配置写到default.conf这个文件中即可,之后使用systemctl start nginx启动nginx即可,刷新配置也使用nginx -s reload
3.2 ubuntu下nginx编译
上述centos下nginx编译需要安装众多依赖环境,而在ubuntu下貌似无需安装(我编译的时候没有提示依赖问题,若有问题的同学请在下方留言,我会补充进去)
3.3 ubuntu下nginx配置
nginx.conf
user  nginx;
worker_processes  1;

error_log  /var/log/nginx/error.log warn;
pid        /var/run/nginx.pid;


events {
    worker_connections  1024;
}


http {
    include       /etc/nginx/mime.types;
    default_type  application/octet-stream;

    log_format  main  '$remote_addr - $remote_user [$time_local] "$request" '
                      '$status $body_bytes_sent "$http_referer" '
                      '"$http_user_agent" "$http_x_forwarded_for"';

    access_log  /var/log/nginx/access.log  main;

    sendfile        on;
    #tcp_nopush     on;

    keepalive_timeout  65;

    #gzip  on;

    include /etc/nginx/conf.d/*.conf;
}
default.conf
server {
    listen       80;

    location / {
        root   /home/medcaptain/sketch;
        fancyindex on;
        fancyindex_localtime on;
        fancyindex_exact_size off;
        charset utf-8,gbk;
    }

    error_page   500 502 503 504  /50x.html;
    location = /50x.html {
        root   /usr/share/nginx/html;
    }

}
“The first 90% of the code accounts for the first 90% of the development time. The remaining 10% of the code accounts for the other 90% of the development time.” – Tom Cargill
标 题:nginx开启目录浏览功能及主题美化作 者:Leif160519
出 处:https://github.icu/articles/2019/09/23/1569228675350.html
关于博主:坐标六朝古都南京,服务器运维工程师+桌面运维工程师,如有问题探讨可以直接下方留言。
声援博主:如果您觉得文章对您有帮助,可以评论、订阅、收藏。您的鼓励是博主的最大动力!