 Leif160519的blog
——————
目录
Gitlab开启LDAP登陆
Gitlab开启LDAP登陆
写在前面
- CentOS 下搭建 openLDAP 的教程参考:Centos7 搭建openldap完整详细教程(真实可用)。
- 自动化安装脚本可以参考我写的:github。
操作步骤
1.修改配置文件
GitLab 其实自带 LDAP 的登陆方式,只不过默认被关闭了,咱们只要在其配置文件中开启并加以简单配置即可。
配置文件中原先关于 ldap 的所有设置如下(配置大概在第 250 行左右,可以用编辑器搜索 ldap_servers 关键字即可定位):
/etc/gitlab/gitlab.rb(修改配置文件之前强烈建议备份!!!)
### LDAP Settings
###! Docs: https://docs.gitlab.com/omnibus/settings/ldap.html
###! **Be careful not to break the indentation in the ldap_servers block. It is
###!   in yaml format and the spaces must be retained. Using tabs will not work.**

# gitlab_rails['ldap_enabled'] = false

###! **remember to close this block with 'EOS' below**
# gitlab_rails['ldap_servers'] = YAML.load <<-'EOS'
#   main: # 'main' is the GitLab 'provider ID' of this LDAP server
#     label: 'LDAP'
#     host: '_your_ldap_server'
#     port: 389
#     uid: 'sAMAccountName'
#     bind_dn: '_the_full_dn_of_the_user_you_will_bind_with'
#     password: '_the_password_of_the_bind_user'
#     encryption: 'plain' # "start_tls" or "simple_tls" or "plain"
#     verify_certificates: true
#     active_directory: true
#     allow_username_or_email_login: false
#     lowercase_usernames: false
#     block_auto_created_users: false
#     base: ''
#     user_filter: ''
#     ## EE only
#     group_base: ''
#     admin_group: ''
#     sync_ssh_keys: false
#
#   secondary: # 'secondary' is the GitLab 'provider ID' of second LDAP server
#     label: 'LDAP'
#     host: '_your_ldap_server'
#     port: 389
#     uid: 'sAMAccountName'
#     bind_dn: '_the_full_dn_of_the_user_you_will_bind_with'
#     password: '_the_password_of_the_bind_user'
#     encryption: 'plain' # "start_tls" or "simple_tls" or "plain"
#     verify_certificates: true
#     active_directory: true
#     allow_username_or_email_login: false
#     lowercase_usernames: false
#     block_auto_created_users: false
#     base: ''
#     user_filter: ''
#     ## EE only
#     group_base: ''
#     admin_group: ''
#     sync_ssh_keys: false
# EOS
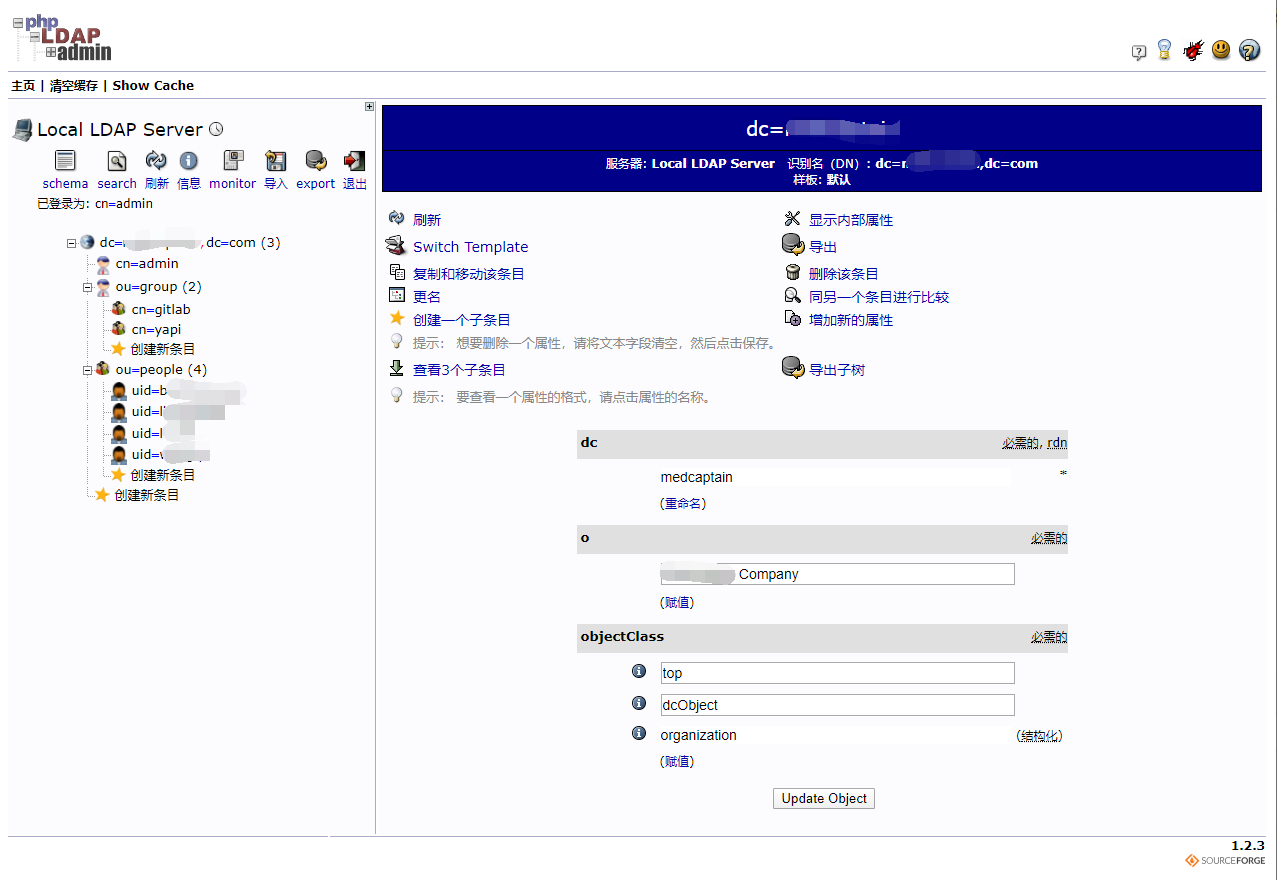
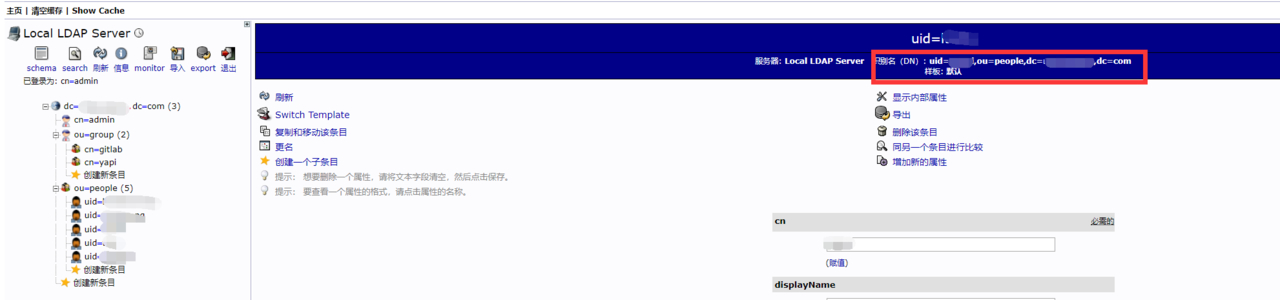
之后根据 ldap 轻量级目录访问协议的目录结构填写相关内容:
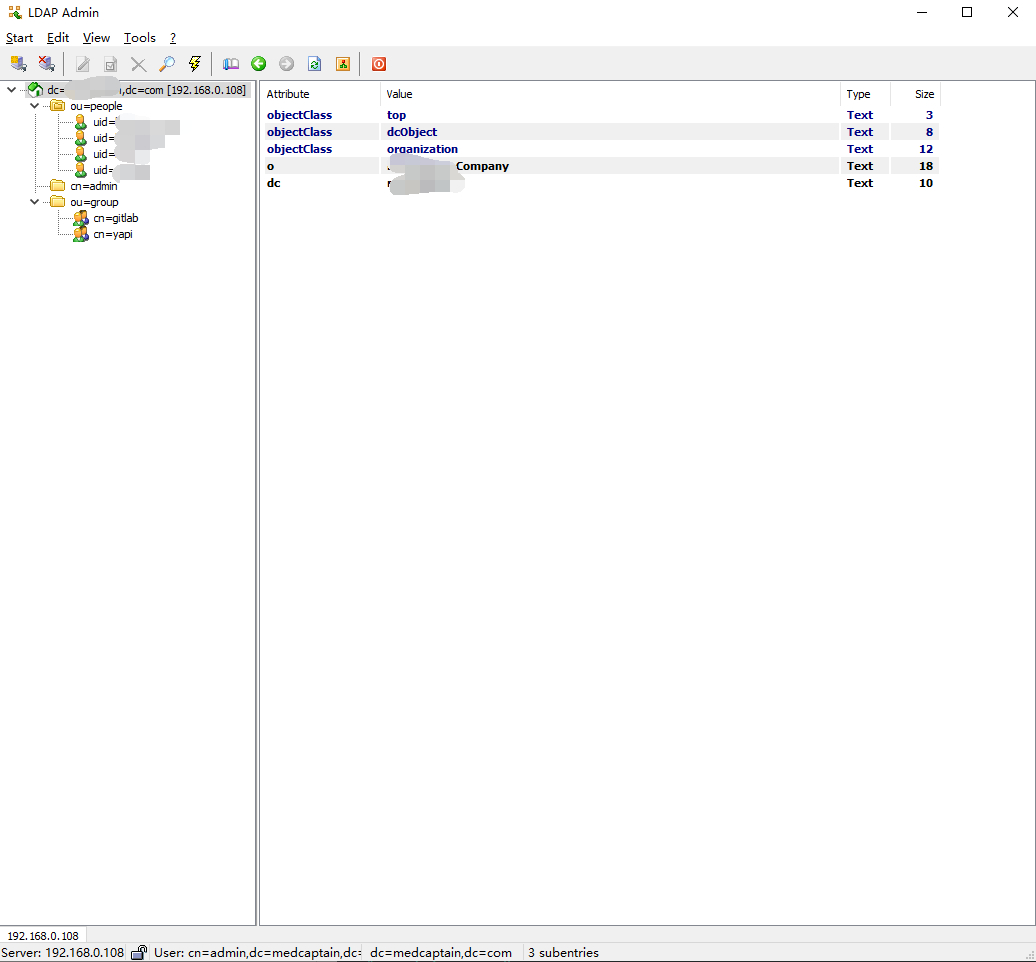
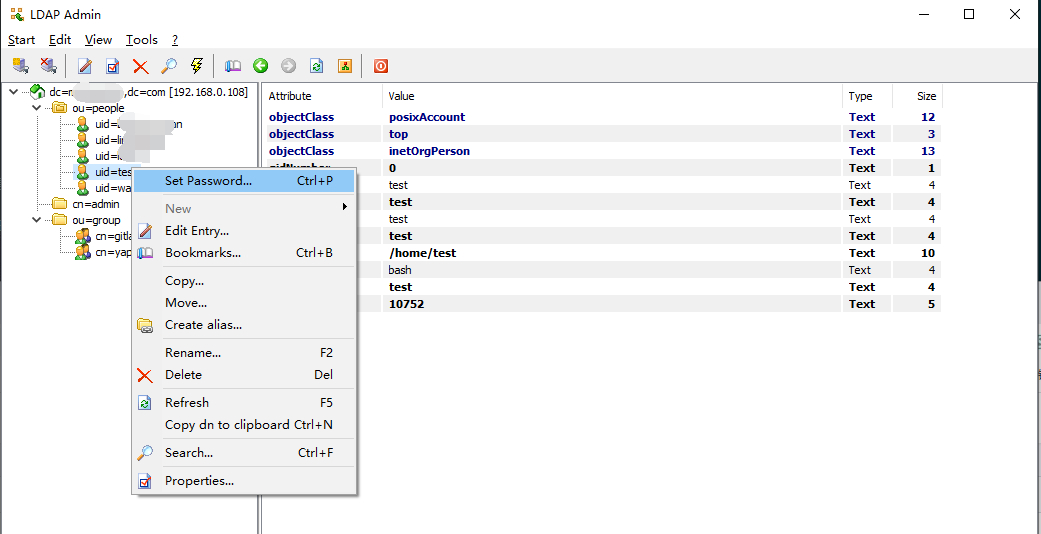
或者用 Ldapadmin 这个工具查看:
按照下面的格式更改配置文件,注意缩进,另外,别忘了最后一行的 EOS 要删除注释:
### LDAP Settings
###! Docs: https://docs.gitlab.com/omnibus/settings/ldap.html
###! **Be careful not to break the indentation in the ldap_servers block. It is
###!   in yaml format and the spaces must be retained. Using tabs will not work.**

gitlab_rails['ldap_enabled'] = true

###! **remember to close this block with 'EOS' below**
gitlab_rails['ldap_servers'] = YAML.load <<-'EOS'
   main: # 'main' is the GitLab 'provider ID' of this LDAP server
     label: 'LDAP'
     host: '192.168.0.108'
     port: 389
     uid: 'cn'
     bind_dn: 'cn=admin,dc=your company name,dc=com'
     password: '123456'
     encryption: 'plain' # "start_tls" or "simple_tls" or "plain"
     verify_certificates: true
     active_directory: true
     allow_username_or_email_login: true
     lowercase_usernames: false
     block_auto_created_users: false
     base: 'ou=people,dc=your company name,dc=com'
     user_filter: ''
     attributes:
       username: ['uid', 'userid', 'sAMAccountName']
       email: ['mail', 'email', 'userPrincipalName']
       name: 'cn'
       first_name: 'givenName'
       last_name:  'sn'
#     ## EE only
#     group_base: ''
#     admin_group: ''
#     sync_ssh_keys: false
#
#   secondary: # 'secondary' is the GitLab 'provider ID' of second LDAP server
#     label: 'LDAP'
#     host: '_your_ldap_server'
#     port: 389
#     uid: 'sAMAccountName'
#     bind_dn: '_the_full_dn_of_the_user_you_will_bind_with'
#     password: '_the_password_of_the_bind_user'
#     encryption: 'plain' # "start_tls" or "simple_tls" or "plain"
#     verify_certificates: true
#     active_directory: true
#     allow_username_or_email_login: false
#     lowercase_usernames: false
#     block_auto_created_users: false
#     base: ''
#     user_filter: ''
#     ## EE only
#     group_base: ''
#     admin_group: ''
#     sync_ssh_keys: false
EOS
参数解释:
gitlab_rails['ldap_enabled'] = true>>>> 开启 LDAP 认证host>>>>LDAP 服务器 IPbind_dn>>>>LDAP 管理员识别名(DN)password>>>>LDAP 管理员密码allow_username_or_email_login>>>> 允许使用 LDAP 用户名或者邮箱登陆base>>>> 用户查找节点user_filter>>>> 用户查找过滤规则attributes及其子项 >>>> 创建用于 LDAP 登陆的用户
2.修改完毕后更新配置
gitlab-ctl reconfigure
3.重启 GitLab 服务
gitlab-ctl restart
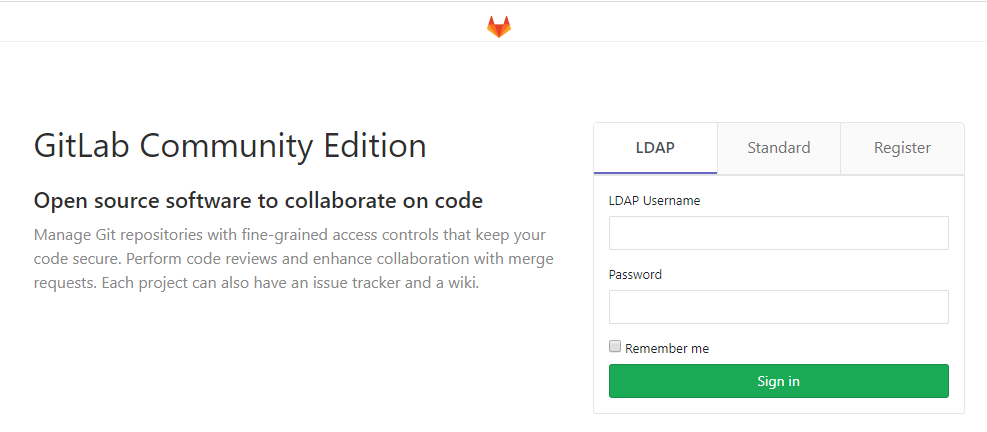
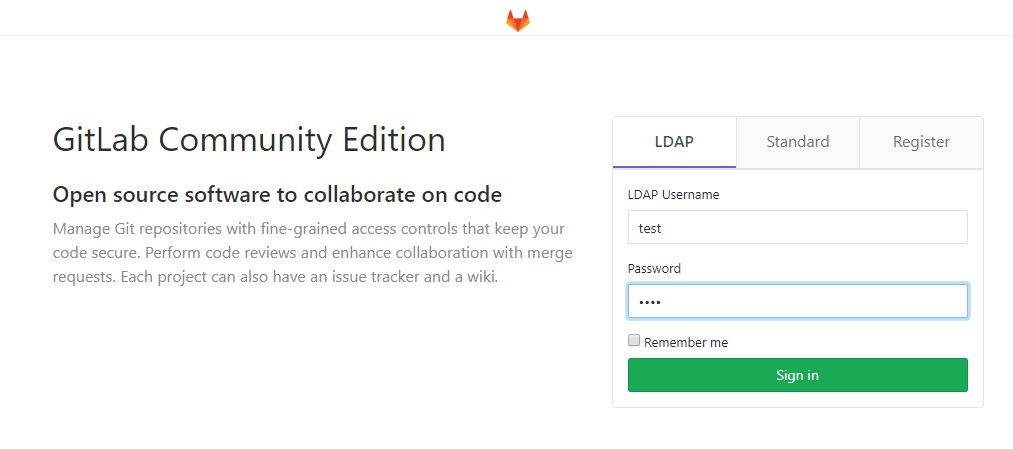
重启 GitLab 之后即可在首页看到出现了 ldap 的登陆入口
4.设置用户标识符
4.1 初次使用 LDAP 登陆的新用户
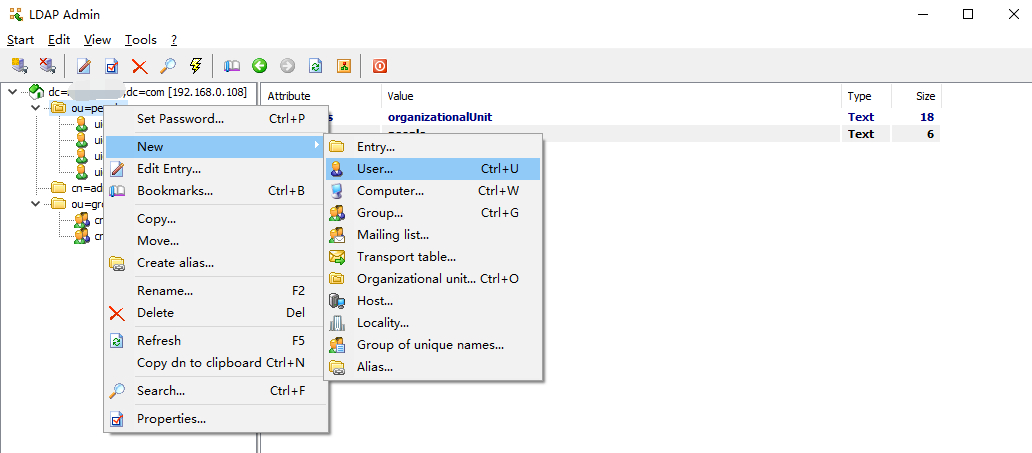
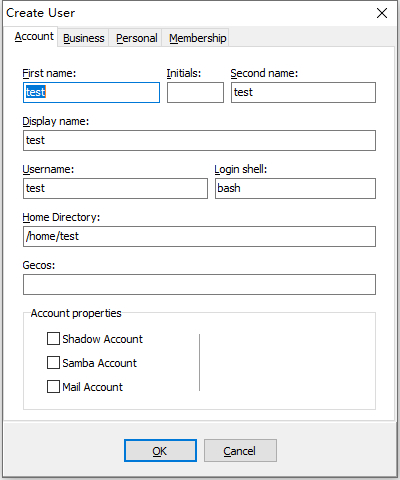
4.1.1 新建用户
4.1.2 填写信息
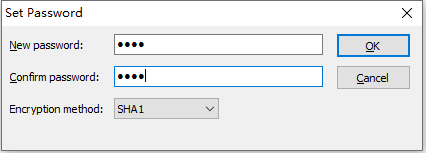
4.1.3 设置 LDAP 密码
4.1.4 登陆
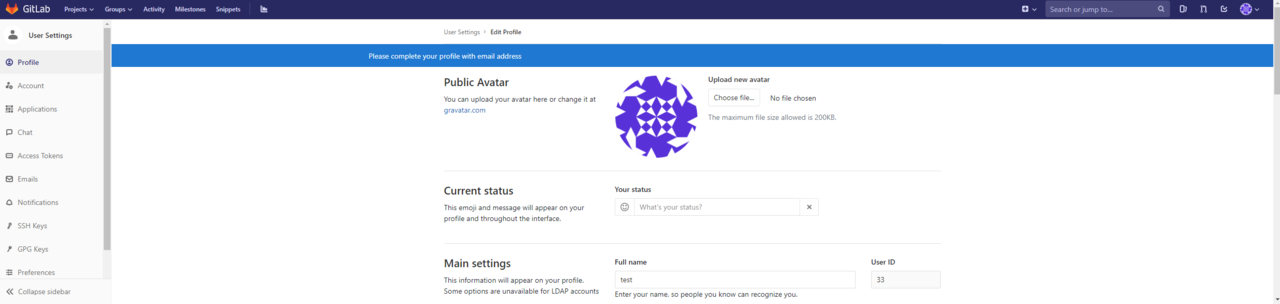
对于新用户来说,LDAP 登陆 Git 之后会自动弹出账户信息设置界面:

新用户会自动绑定LDAP的识别名:

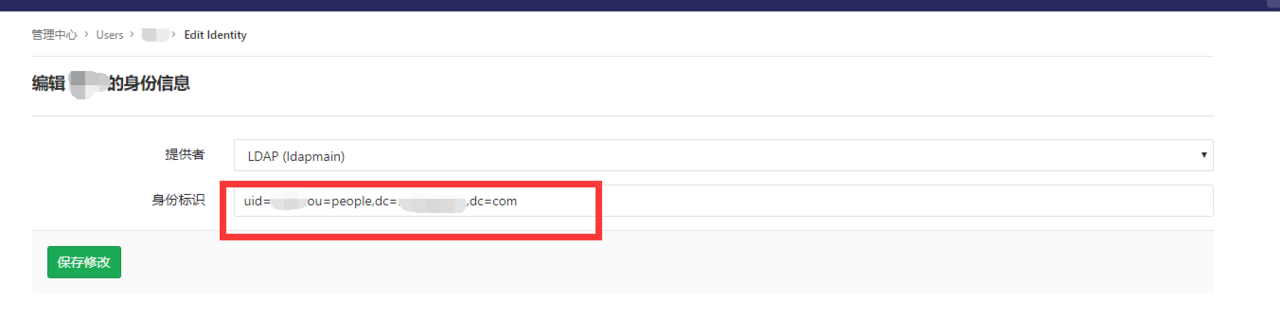
4.2 将 LDAP 账户与已有 Git 普通账号绑定
GitLab 管理员直接在用户标识符中绑定识别名即可:
5.注意点
- 若已经设置过 ldap 标志符的用户因密码输入错误(无论是 ldap 的密码还是普通密码)达到一定次数以上导致账户被锁定的话,必须先删除已有的标志符才可以解锁。
- 因 admin 管理员账户不属于前面提到的
base范围内,故 GitLab 的 root 管理员无法使用 ldap 登陆,除非在 people 下新建一个用户之后用识别名(DN)与 Git 管理员绑定标识符。 - 上述
4.1的步骤中,若 LDAP 用户名与已存在的 GitLab 用户名一致,则两者账户相互绑定,该 GitLab 账户的标识符自动绑定 LDAP 识别名
6.参考资料
“The first 90% of the code accounts for the first 90% of the development time. The remaining 10% of the code accounts for the other 90% of the development time.” – Tom Cargill
标 题:Gitlab开启LDAP登陆作 者:Leif160519
出 处:https://github.icu/articles/2020/02/19/1582112704896.html
关于博主:坐标六朝古都南京,服务器运维工程师+桌面运维工程师,如有问题探讨可以直接下方留言。
声援博主:如果您觉得文章对您有帮助,可以评论、订阅、收藏。您的鼓励是博主的最大动力!